Channels Tab

This tab has secondary tabs down the left-hand edge that correspond to the different information you may want to edit.
If a channel does not have an attribute for a displayed column the cell will be greyed out and cannot be edited. An “n/a” will also appear in the cell.
Tricks for editing multiple cells at once:
This window provides a few hidden techniques to make entering large amounts of information easier.
The first step to using these features is to select multiple cells at once. By holding down the mouse button you can click and drag over any number of cells in the grid and all the cells will become selected. You can select multiple cells by selecting the first one and then holding the <SHIFT> key down and selecting the last one. You can select multiple cells in any number of columns however it may not make sense to edit some columns together.
Once you have selected the cells you want to edit, enter a value into the first cell and press the <ENTER> key. As soon as you are done, all the highlighted cells will receive the value you have entered.
The value in one field can be copied and pasted into other fields. Select the field to be copied and right-click on it. Choose the copy option in the popup menu. Now click on other field(s) to replace the current value(s) with the copied value. When through, right-click again and choose “Cancel Copy”.
The right-click menu also has the option to clear the selected cell(s).
Time and Delay fields – The time and delay columns will accept the same technique for entering values into multiple cells, however these fields support additional syntax for spread timing. You can enter a range of times using the “/” as a through command.
Example: 1/10 – This will put time values into the selected cells spreading them between 1 and 10 seconds. The first cell will receive 1 second and the last cell 10 seconds. Every other cell will receive a value between 1 and 10seconds depending on their position.
Example: 2/15/3 – This is similar to the above example, but the middle value will be placed into the middle cell of the selected range. So that the first cell will receive 2 seconds the middle cell will receive 15 seconds and the last cell 3 seconds. All other cells will receive a proportion of the range entered.
Example: R10 – the “R” is a special modifier that means “random”. Using the “R” in front of the value means that the result will be a random number between 0 and 10. All the selected cells will receive a different random number.
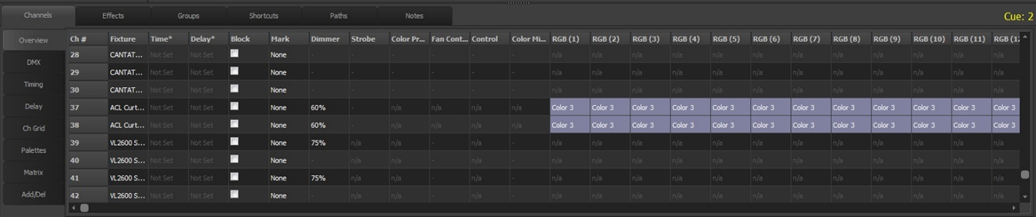
Overview |
The overview tab will show the attributes values as real-world information. Most values will be shown as percentage information, but some values may show other data. A gobo control for example will show an image of the gobo selected and the color controls will show the color that is currently assigned. Attributes set by the application of a palette will have the palette label displayed with a dark grey background.
The values set in the overview and DMX tabs will determine the value that the attribute will reach when the cue is executed.
This tab also provides optional time and delay for the individual channels. For attribute level timing see the “Timing” and “Delay” tabs.
Block – Check the “Block” check box to force this channel to not follow tracking instructions. All the values set in the cue will be applied to the live output regardless of the previous cue execution.
Mark – A marked cue will execute most of its attributes in the previous cue if the channel does not exist in that cue. It uses the fade in and dwell time of the previous cue as the time the fixtures will change, but you can override this by setting a non-zero value into the “default mark time” found in “System Properties.” A mark can be set to instruct the attributes to change at the “Earliest” or “Latest” time.
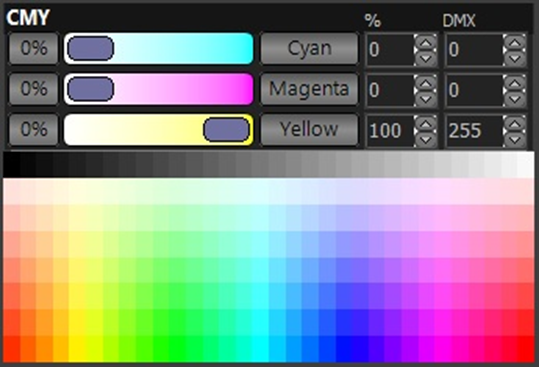
Some of the attribute columns provide helper controls that can be accessed by double clicking on the cell. For the color cells the standard NEO color picker will appear.
DMX |
The DMX tab will show all of the same information as the overview tab, but all of the entries will be shown as DMX values. This provides the maximum resolution when modifying the data in the cue. For example, in the overview tab the dimmer is shown as a percentage giving 100 possible values but the underlying DMX associated with the dimmer has 255 (or in some cases 65535) possible values.
Timing |
To set an individual fade time for any attribute use the timing tab to enter a time value in seconds. If the value shows “Not set” then no independent fade time exists. Any fade time set here will override the channel fade time and the cue timing.
Delay |
To set an individual delay time for any attribute use the delay tab to enter a time value in seconds. If the value shows “Not set” then no independent delay exists. Any delay set here will override the channel delay and the cue timing.
Ch Grid |
The channel grid view will show the channels in a similar way as the channel display window. Editing channels in this view is similar to the channel display. You can select the channels using the mouse and control the dimmer value with the scroll wheel. Other attributes if shown are read-only and cannot be altered in this view.
The “View” menu can be used to change the way each channel is displayed. The choices are “Expanded (Verbose)”, “Compact” and “Classic”.
In the view menu you can toggle between showing only the channels that are recorded into the cue and showing all the channels in the system. The default is “Show only channels included in this cue”. If this option is turned off, the channels not recorded into the cue will be displayed in a light grey and you can use the “Add Selected” button to add channels into the cue.
Use the “Remove Selected” button to remove channels from the cue.
Palettes |
This tab shows which fixture attributes are being set by the data stored in generic or specific palettes and is a means by which you could edit cues to change or include new palette information. This requires detailed knowledge of palette types and what attribute data is stored in each. For example, applying a position palette to a color attribute will have no effect on the fixture when the cue is run. The easiest way to work with palettes is to record and modify them from the main display.
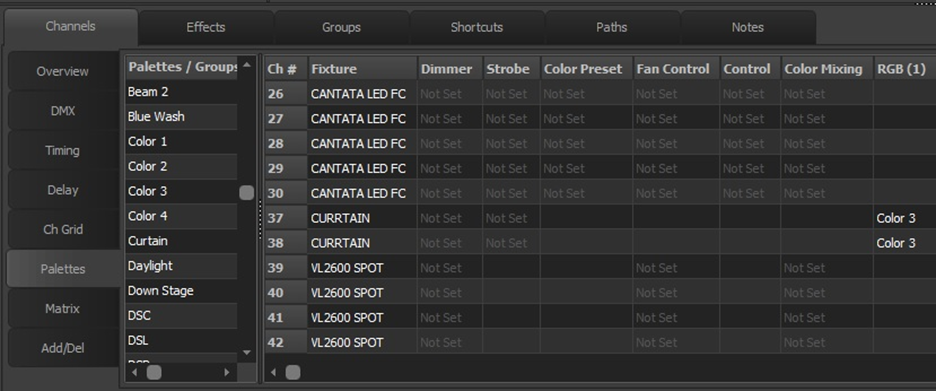
This tab has two panels separated by a movable splitter. In the left-hand panel is a list of all the available palette references that can be added to the channels in this cue. This is an alphabetical list of both groups (specific) and generic palettes.
The panel on the right is similar to the Overview and DMX tabs. Each row is a fixture and each column an attribute.
To add a palette reference to an attribute select it from the panel on the left and while holding the mouse button down drag and drop it onto the attribute.
Alternatively, you can enter palettes by clicking in the required attribute field and start typing the name of the palette you want. As you begin to type a popup list of palettes will appear. Use the up and down arrow on your keyboard to select the palette you want and press <ENTER> to assign it to the attribute.
Matrix |
For groups that have channels assigned to a matrix, this view shows the cells in the selected matrix which can be changed if desired.
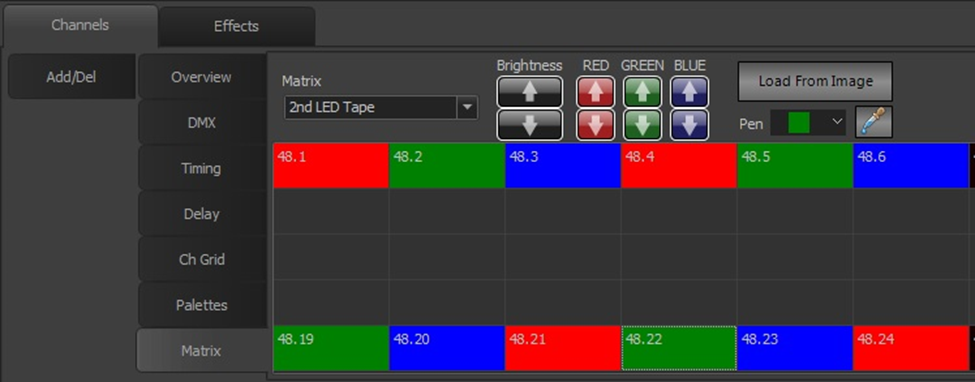
The background color of all cells can be set using the Brightness and Color buttons. Individual cells can be set by choosing a Pen color and clicking on the desired cell(s). Click and drag may be used to set a block of cells.
Add/Delete |
This tab provides convenient options for adding and removing channels from the cue.
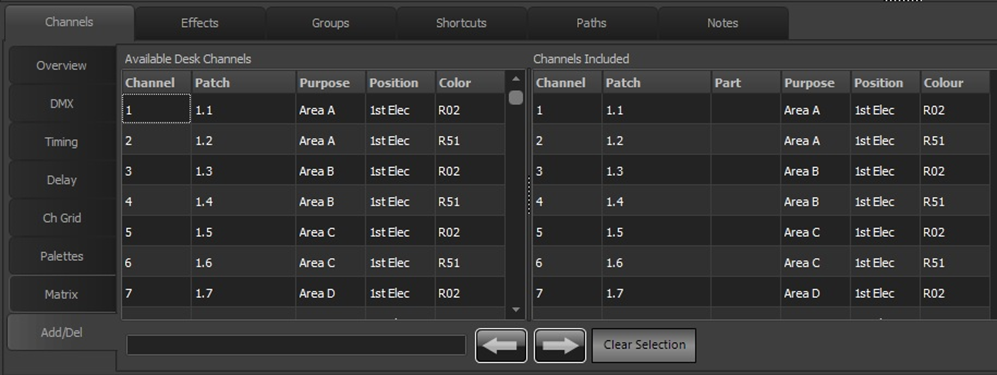
This window is divided into two halves. On the left-hand side is a list of all the channels in the system.
Additional information such as purpose, position, etc. are also provided to help identify channels. The right-hand panel is the list of channels that are included in the cue.
Select the desired channels in the left-hand panel to add to the cue and click on the add button (right arrow) at the bottom of the page.
To remove, select the desired channels from the right-hand panel and click on the remove button (left arrow).
You can also use the channel syntax box to enter channels to be added. If text is entered into this edit box it will take precedence over the selected channels when the add button is pressed.