Introduction
Quick Start
Creating a New Show
Patching Some Fixtures
Live Channel Control
Recording Groups, Palettes & Submasters
Recording & Updating Cues
Adding an Effect
Saving the Show
Running a Show
Front Panel
Displays
Top Menu Bar
Selection Keys & Options
Selection Tool
On & Out
Home
Fan
Hi Light
Park
Undo
Release
Recording Buttons & Options
Groups
Palettes
FX Library
Copy
Command Line
Master Fade Time & Page Controls
Windows
Options Menu
More Options
New Show
Open File
Save & Save File...
Connect to remote
Backup Now
Task Scheduler
User Security
Reports
Patch
Patch Window
Command Line Patching
Drag & Drop Patching
Patch Detail Pane
Options Menu
RDM
Edit Menu
Soft Keys
MUTE Output
Visible Columns
Search Bar
DMX Outputs Pane
Fixture List Pane
Patch Encoders
Matrix Editor
Controlling Fixtures
Color
Selecting Channels
Intensity
Attributes
Releasing Channels
Channel Commands
Additional Channel Commands
Parking
Groups & Palettes
Groups & Palettes Editor
Group Details
Group Details Pane
Channels Overview Tab
Channel Grid
Matrix
DMX
Timing & Delay
Add/Delete
Palettes
Effects
Groups & Palettes Editor
Editor Grid
Editor Options
Select Active Button
New & Delete Group
Filtering
Group Mode Commands
Palette Types
Recording & Updating Groups & Palettes - Command Line
Record Group
Record Palette
Palette Windows
Generic Palettes
Effects
FX Playbacks
FX Editor
FX Editor
Creating new effects
Simple lighting chase
Timeline effect
Profile effect
Matrix Effect
Paint Box Effect
Media Playback Effect
DMX Recorder
Deleting an Effect
Effect Options
Effect Library
Effect Editor Controls
Recording Chases
Submasters
Cues & Cue Lists
Cue List Editor
Cue List Details
Cue List Editor
Cue Lists
Cue List Grid
Options Menu
Cue Options
Cue List Execution
Recording & Updating Cues - Command Line
Recording Cues - UI
Update Cue - UI
Cue Timing
Follow and Link
Copying & Moving Cues
Deleting Cues
Cue Execution Commands
Playbacks
Shortcuts
Snapshots
Magic Sheets
Macros
Blind
System Properties
System (DMX)
System Settings
Show Defaults
Network Access
Appearance
System Properties
Basic Mode Settings
Registration
Visualizer
Remote Options
Media Settings
Special Shortcuts
NEO Console Debug
Keyboard Shortcuts
External Triggers
MIDI
MIDI Control
MIDI Learn
Note Triggers
Note Velocity
Control Change Events
Timecode (MTC) / Clock
MIDI Show Control
Debug Messages
External Triggers
Line in
Timecode A & B
mySQL
Vision.Net
Contacts
OSC
ChilliNet
iCAN
Typing into the Command Line
Command Syntax Conventions
Saving & Loading Show Files
Programming Commands
Communication with external systems
Timing Commands
Software Updates
NEO Tips & Tricks
- All Categories
- Groups & Palettes
- Groups & Palettes Editor
- Editor Options
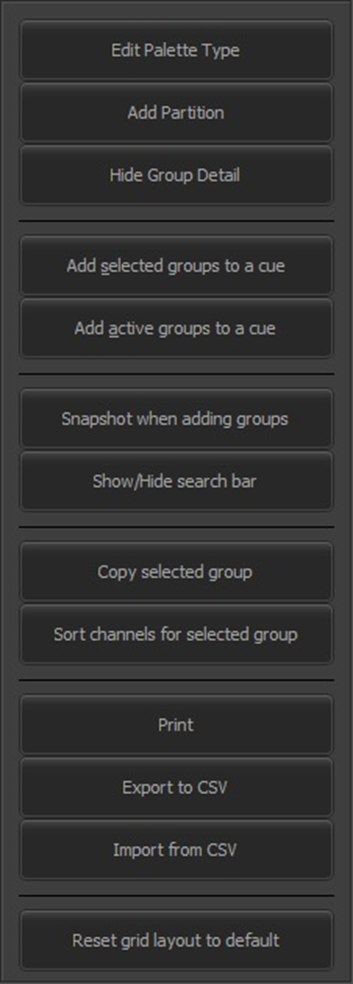
Editor Options

The Options menu button is located along the top row of buttons in the Groups window.
Edit Palette Type
The attributes recorded into (specific) palettes are organized into categories called palette types. The attributes included in each type are determined by this option. When selected, the following table is displayed:
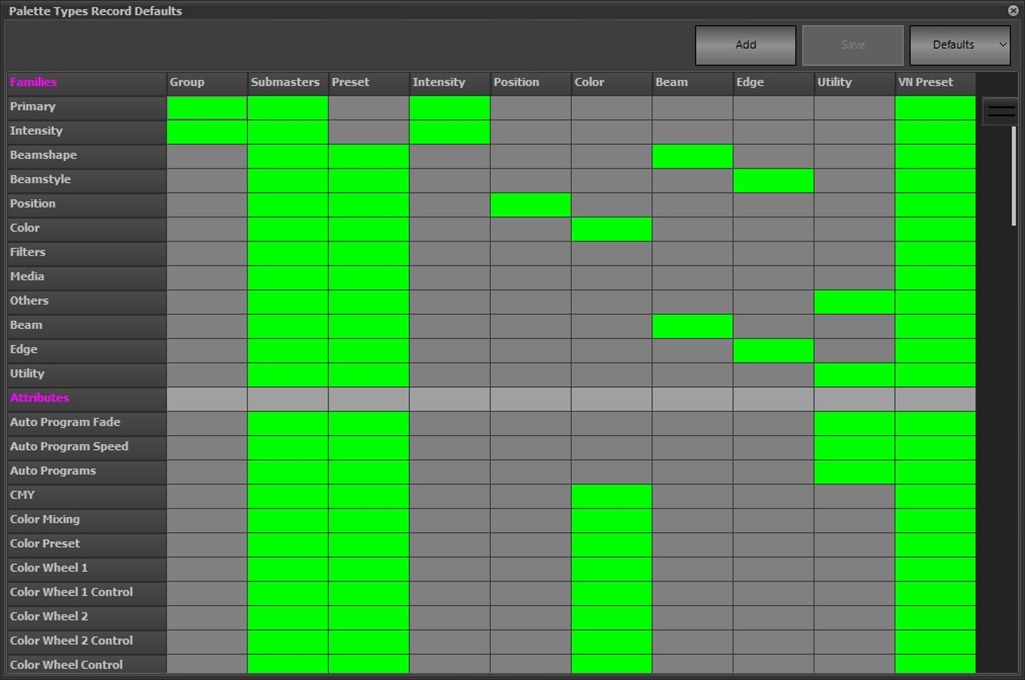
The row labels (grouped as Families and Attributes) are determined by the profiles of the fixtures patched into the current show, thus may have different entries. The columns represent the standard attribute types for specific palettes. The attributes associated with each type are indicated by the green-shaded cells in the table. For example, the Color attribute type includes CMY, Color Mixing, Color Preset, Color Wheel 1, etc. in the table shown.
You can customize this table to change what attributes get included in each type. Clicking on a grey cell will turn it green and thus that family or attribute will be included in the type. Clicking on a green cell will turn it grey and thus the family or attribute will be excluded.
Also, you can create new attribute types by clicking on the “Add” button and supplying a name in the dialog presented. For example, you may want to separate the color mixing attributes of your fixtures from the color wheel attributes. Thus, you could create a new type called “Wheel” which will add a column by that name. Then you could click on cells in the Wheel column to include “Color Wheel 1” and “Color Wheel 1 Control” etc. in the new type and click on the corresponding cells in the “Color” column to remove those attributes from the Color type.
To save any changes made to the table, click on the “Save” button. If you’ve added any new types, these will be added to the “Record Group” and “Record Palette” dialogs available from the “Channel Display” window and when groups or palettes are recorded, the new specific palettes will be added to the “Group/Palette Grid”.
The “Defaults” button has three options:
· Save as defaults will save the current table so that new shows will inherit the changes.
· Restore defaults will recall the last saved defaults.
· Restore factory defaults.
Add Partition
As described in the Special Groups section above, the total channel count may be divided into separate parts. Click on this option to create a new partition.
Hide Group Detail
By default, the window is divided into two sections. The bottom section shows details of the data stored in the selected group. Clicking this option will close this section and expand the top section to fill the window. The detail section may be recalled by clicking this option again.
Add selected groups to a cue
To create a new cue or add groups to an existing cue:
· Select the groups you want to add to the cue by clicking on the row to highlight it. Use the <SHIFT> or <CTRL> key to select multiple groups.
· Click on the options button and from the resulting drop-down menu select “Add selected groups to cue”.
· The “cue selection” dialog will pop up to select the cue into which you want to add the group(s). Set the “cue list” and “cue” number of the desired cue.
· If you want to add a short description to the cue being created, enter this into the field provided.
· Select “OK” to complete this operation
NEO Notes & Tips: The “cue selection” dialog will default to the last selected cue list and the next available (integer) cue number.
To cancel the operation and return to the channel window click on the “Cancel” button.
Add active groups to a cue
This operation will work exactly as the above option with active groups (groups with a value above zero) added to the cue rather than selected.
Snapshot when adding groups
Toggle the “Snapshot when adding groups” option to record the current channel state into all newly added groups.
Show/Hide search bar
By default, the search bar is displayed when the Groups window is called up from the Command Window. The search bar is located at the bottom of the Group/Palette grid.
You can locate a group in the grid by entering a few characters in the edit box and the first group to match will be highlighted. If you have several groups with the same leading characters, you can us the “Find Next” and “Find Previous” buttons to navigate the list.
You can dismiss the search bar by clicking the “Close” button or selecting this option, which is a toggle. Once dismissed, use this option to redisplay the search bar.
Copy selected group
Select (highlight) a group and use this option to create a copy. The new group will be given the name “Copy of …” with the “…” representing the name of the original selected group.
Sort channels for selected group
If you create a new group or add channels to an existing group, the channels will be listed in the order they were added in the Details Pane. Clicking on this option will order the channels in the selected group numerically from low to high.
This option will bring up a preview window from which a list of the groups can be sent to a system printer.
NEO Notes & Tips: It is recommended to take the show file to a PC and print from there. It will allow taking advantage of printers that are installed on a standard PC rather than trying to install printer drivers on the Neo family hardware.
Export to CSV & Import from CSV
These options allow you to create a Comma Separated Values (CSV) file containing the list of groups or to read in a CSV list generated from another show.
Reset grid layout to default
If you have rearranged the columns in the Group/Palette grid, use this option to restore the default layout.