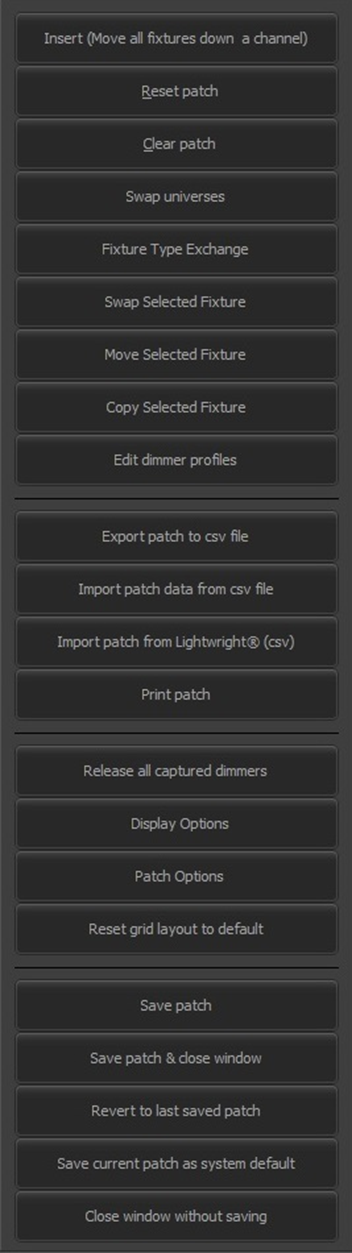
Options Menu

A drop-down menu at the top of the patch window provides access to various miscellaneous options.
Insert (Move all fixtures down a channel)
Use the insert if you need to add a fixture to the patch and want to add it between two other patched channels. The insert option will move all the patch information down one channel from the currently selected channel.
Warning: Use this option with care. If cues have already been recorded, the new and shifted channels are not updated, thus cues will need to be manually updated.
Reset Patch
This option has a submenu with the following choices:
All Channels |
Selecting “All Channels” from the submenu will return all the channels (fixtures) back to a 1:1 patch. Each channel will be patched to the corresponding dimmer address. A warning and confirmation dialog will be displayed.
Reset Patch by Range |
To reset a range of channels (fixtures), select the desired channels by clicking on the first channel row and then clicking on the last channel row to be reset while holding down the <SHIFT> key. Select “Reset Patch by Range” from the submenu to reset the selected channels. A warning and confirmation dialog will be displayed.
Set Visualizer Patch 1:1 (conventionals) |
In some cases where you have a show that runs at different venues, the patch you’ve set up for the visualizer may be different than the patch in NEO. Setting this option will allow the visualizer to use a 1:1 patch while NEO is patched to match the venue’s dimmer assignment.
Clear Patch
This option has a submenu with the following choices:
All Channels |
Selecting “All Channels” from the submenu will remove all the patch information from the system.
Clear Patch by Range |
To clear a range of channels (fixtures), select the desired channels by clicking on the first channel row and then clicking on the last channel row to be cleared while holding down the <SHIFT> key. Select “Clear Patch by Range” from the submenu to clear the selected channels. A warning and confirmation dialog will be displayed.
Patches may be cleared using the command line: Example: “1 THRU 4 @ <Enter>” would clear the “Patch Addresses” from Fixtures 1 through 4.
Clear Patch by Universe |
You can clear the patch by universe by selecting its number from the sub menu. A warning and confirmation dialog will be displayed.
Clear Visualizer Patch |
If you have altered the visualizer patch detail, the default can be restored by selecting this option.
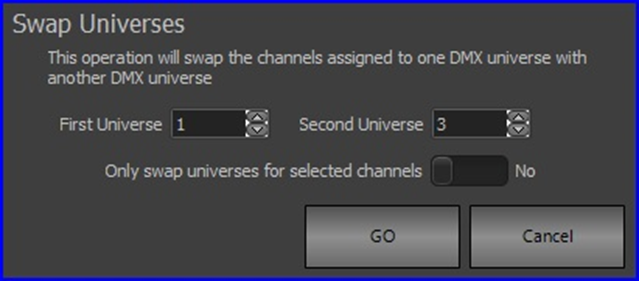
Swap Universes
Use this option to move fixtures from one DMX universe to another.
Fixture Type Exchange
This option may be used to replace some or all instances of one type of fixture already patched for another type. When clicked, the following dialog window appears with the “Select Fixture” tab selected:
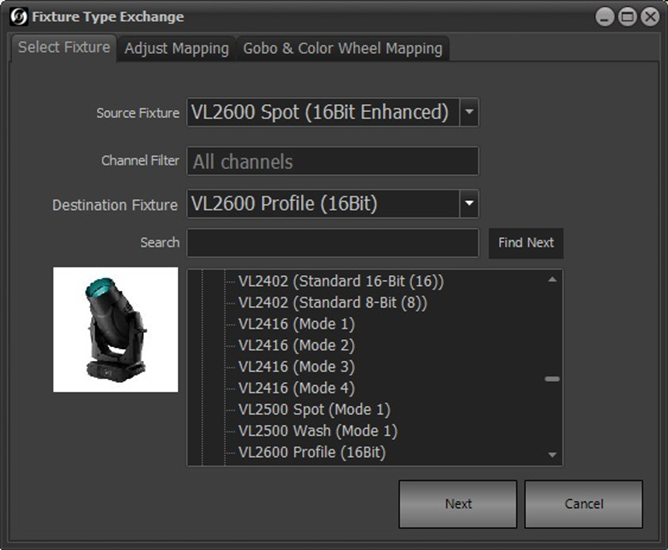
In the example above, all instances of the Vari-lite VL2600 Spot are to be replaced with VL2600 Profile fixtures. The “Source Fixture” is a pulldown list of all fixture types currently patched into the show from which one may be picked to be exchanged for the “Destination Fixture”. The destination fixture may be one that’s already patched, or a new type may be selected from the list below the pulldown.
To aid in locating a fixture brand and model, you can start typing in the “Search” box.
NEO Notes & Tips: Care must be taken that the number of DMX addresses used by the destination fixture is equal to or less than the source fixture to avoid patching errors.
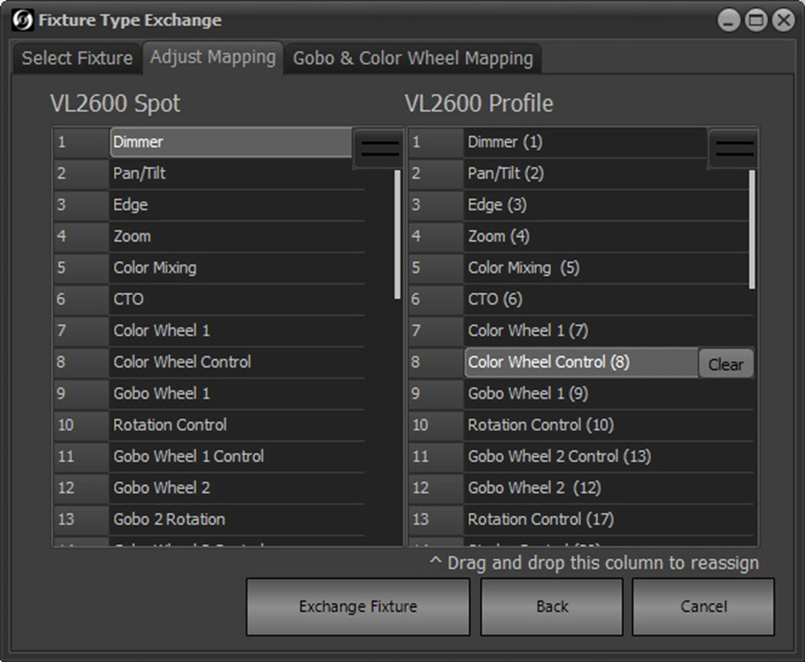
If not all source fixtures are to be replaced, a list of channels to be exchanged may be entered into the “Channel Filter” box. When all information has been entered, clicking “Next” will switch the window to the “Adjust Mapping” tab:
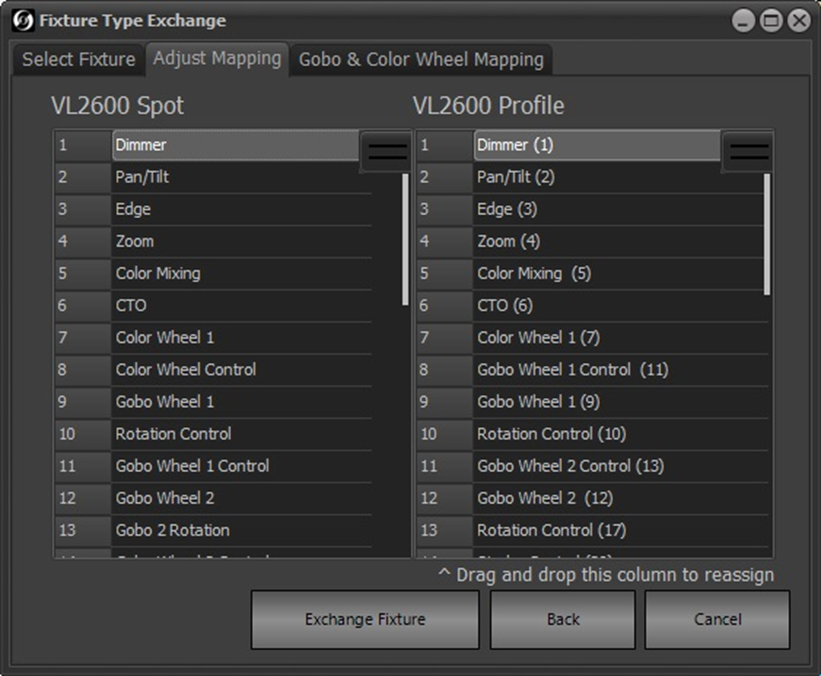
The software tries to match the attributes of the source fixture with those of the destination fixture. Depending on the fixtures chosen, not all attributes of the source may be matched by the destination and some attributes of the destination may have no equivalent match to the source. In addition, some attributes between the source and destination may be incorrectly matched. This may be adjusted by moving attributes of the destination fixture to more closely align them with the source fixture.
Example: Attribute 8 of the VL2600 Spot is “Color Wheel Control”, while Attribute 8 of the VL2600 Profile is “Gobo Wheel 1 Control”. To adjust the mapping, scroll through the right-hand list to find “Color Wheel Control”, click on its Attribute Number and drag it to the Number 8 position. The resulting screen is shown below:
After checking the mapping of attributes, the third tab labelled “Gobo & Color Wheel Mapping” may be selected for more refined adjustments of those attributes. Below is an example:
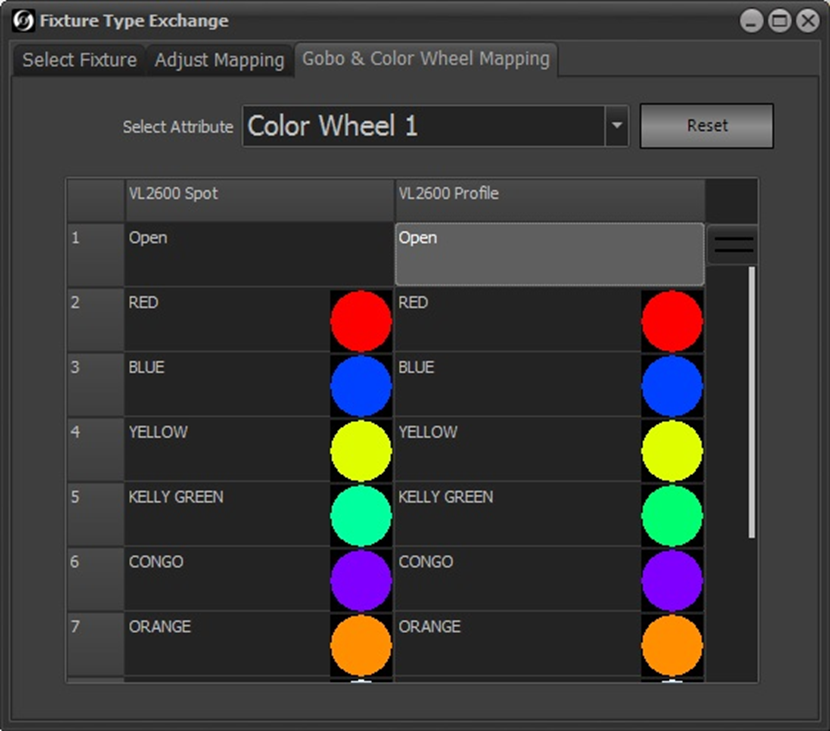
In this case, the color wheels of both fixtures have matching colors in each slot. If that were not the case, you could click on a color in the right-hand list and choose a closer match from the list presented.
Each attribute of the fixtures can be selected from the “Select Attribute” pulldown list and adjustments made to non-matching attributes.
When all adjustments have been made, return to the “Adjust Mapping” tab and click on “Exchange Fixture” to complete the exchange. After acknowledging the warning message, the software will first re-patch the selected (or all) source fixture channels with the destination fixture, then proceed through all cues, groups, palettes and effects to remap the stored data.
Swap Selected Fixture
This option may be used to swap the fixture patched to one channel with that of another. First, select one of the channels to be swapped in the Fixture Details pane, then choose this option which displays the following dialog:
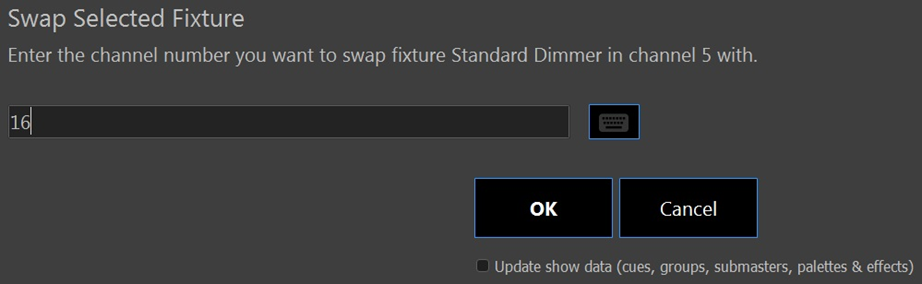
As instructed, enter the destination channel for the swap and click OK. You have the option to update the show data also by clicking on the check box before proceeding.
NEO Notes & Tips: Care must be taken that the number of DMX addresses used by the channels to be swapped are equal to avoid patching errors.
Move Selected Fixture
This option is similar to “Swap Selected Fixture” except the destination channel must be empty. If the destination channel already has patch information, a warning is displayed, and the operation is cancelled.
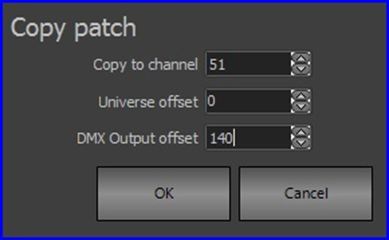
Copy Selected Fixture
Use this option to copy single a channel or a range of channels and paste it/them into the patch specifying the starting channel, an offset for the universe and an offset for the DMX address.
Edit Dimmer Profiles
When patching standard dimmers, it’s possible to patch more than one to a channel and all will output the same level according to the profile selected for the channel. Use this option to adjust the profile of each individual dimmer patched to the same channel. When this option is selected, a new window will be displayed allowing you to select a dimmer and change its profile.
Export Patch to CSV
Use this option to create a Comma Separated Values (CSV) file of the patch that can be imported into Excel or other application. This is also a good way to get the correct fields to use for importing patch data.
Import Patch Data from CSV File
To import patching from a delimited file format (CSV), select “Import Patch Data from CSV File” from this menu. An “open file” dialog will be displayed to select the file to import.
The format for the imported data is channel, dimmer, fixture brand, fixture name. To supply a list of dimmers for a channel enclose the list in quotation (“) marks. If you are including an intelligent fixture in the patch information, it is recommended that the brand and fixture name be enclosed in quotation marks.
Import Patch from LIGHTWRIGHT® (CSV)
Patch information can be imported from a LIGHTWRIGHT® file. You would first need to export a CSV file from LIGHTWRIGHT® and keep all default column settings and assignments.
NEO Notes & Tips: NEO needs the first record to be the export field labels. The first 3 are the important ones and must be Purpose, Channel, Dimmer in that order, otherwise the import will fail.
Print Patch
Select “Print Patch” to print all patched channels to a system printer.
Use the print preview and printer settings to adjust the look and layout of the patch information that will be sent to the printer.
Release All Captured Dimmers
If a DMX output has been set manually to a value, it is considered captured. This means that regardless of the desk channel setting the output will remain at its captured value. Captured outputs are identified by a red number showing in the top right-hand corner of the address box in the DMX Outputs pane.
To release all outputs back to regular control, select this option from the menu. Also, this can be achieved by entering dim rel in the command line interface.
Display Options
Show Patched Addresses as Absolutes |
Normally DMX addresses in the Patch Detail are shown in the form U.Address, where U is the universe number and Address is in the range of 1–512. Setting this option changes the format to Address, where the range is 1-(512 X # of Universes). For example, if the system is set for 2 Universes, the address range would be 1-1024.
NEO Notes & Tips: The addresses in the DMX Outputs pane are always shown as 1-512 for each universe. If you patch an address from a universe greater than one, it will be translated to the proper absolute address. Example: Patching Address 10 in Universe 2 would be translated to 522 in the Patch Detail pane.
Automatically Lookup Text when Typing |
When entering information into Patch Detail cell grids that accept text, this option when set will attempt to complete the entry in a manner similar to the way Microsoft Excel™ works.
First DIP Switch Value is 0 |
The DMX Setting column of the Patch Detail grid shows a graphical representation of a DIP switch pack that some fixtures use to set their DMX address. In rare instances the representation may not match the actual settings on the fixture itself and selecting this option may correct that issue.
Autosize “Patch Address” Column |
This option is set by default. When set, adjusts the “Patch Address” column so the complete addresses are always visible.
Show/Hide Search Bar |
The search bar at the bottom of the Patch Detail pane can be displayed or hidden if not used. When hidden, the grid is expanded into the space it normally occupies.
Patch Options
Replace dimmers when Drag and Drop Patching |
This option is set by default. If you drag a new address and drop it into a channel that’s already patched, the new address will supersede the original. If this option is unchecked, a new address would be added to the original, so both addresses would be under the control of a single channel.
Patch Fixtures in Reverse Order |
For patching multiple fixtures using the drag & drop method. If set, this option would place the fixture with the highest address first in the target range.
Command Line Always Overwrites Existing Patch |
If the Patch Window is docked to the Main Display thus enabling the Command Line Method of patching, setting this option will cause any patch information entered via the Command Line to overwrite any existing Patch Address(es) regardless of the state of the “Replace Dimmers…” option above.
Reset Grid Layout to Default
If you’ve deselected some of the columns in the Patch Details grid and/or rearranged them, this option will restore them.
Save Patch
The patch information is the only data in NEO that must be saved explicitly. You can use this option to save the patch at any time.
Save Patch & Close Window
Similar to the above, saves the patch and also closes the patch window.
Revert to Last Saved Patch
If you’ve been re-patching a show file and decide you’d like to return to the original configuration, you can use this option to restore the patch to its previous state.
Save Current Patch as System Default
Close Window without Saving
You can close the patch window without saving the current state to remove it from the screen and recall it later from the Command Window.
Warning: If you close the patch window without saving the current state and then exit NEO, the patch will be restored from the previous configuration when NEO is restarted. All changes made since that last save will be lost.